In time for the end of Summer…

So a month or so ago I finally setup an automated sprinkler to soak the grass between the neighbours house and ours, where we had no sprinkler system already.  Once I had a little time, this surprisingly easier than I expected.  Basically it required a water solenoid to control the flow of water, some adapters from the 3/4″ standard hose to the 1/2″ of the solenoid, and 12V power to trigger opening the solenoid (by default closed).  Using the previous code I used for a rain by-pass, I used it to do the opposite: open the solenoid when there was no rain in the forecast vs the bypass which would break the circuit of the sprinkler when there was rain in the forecast.

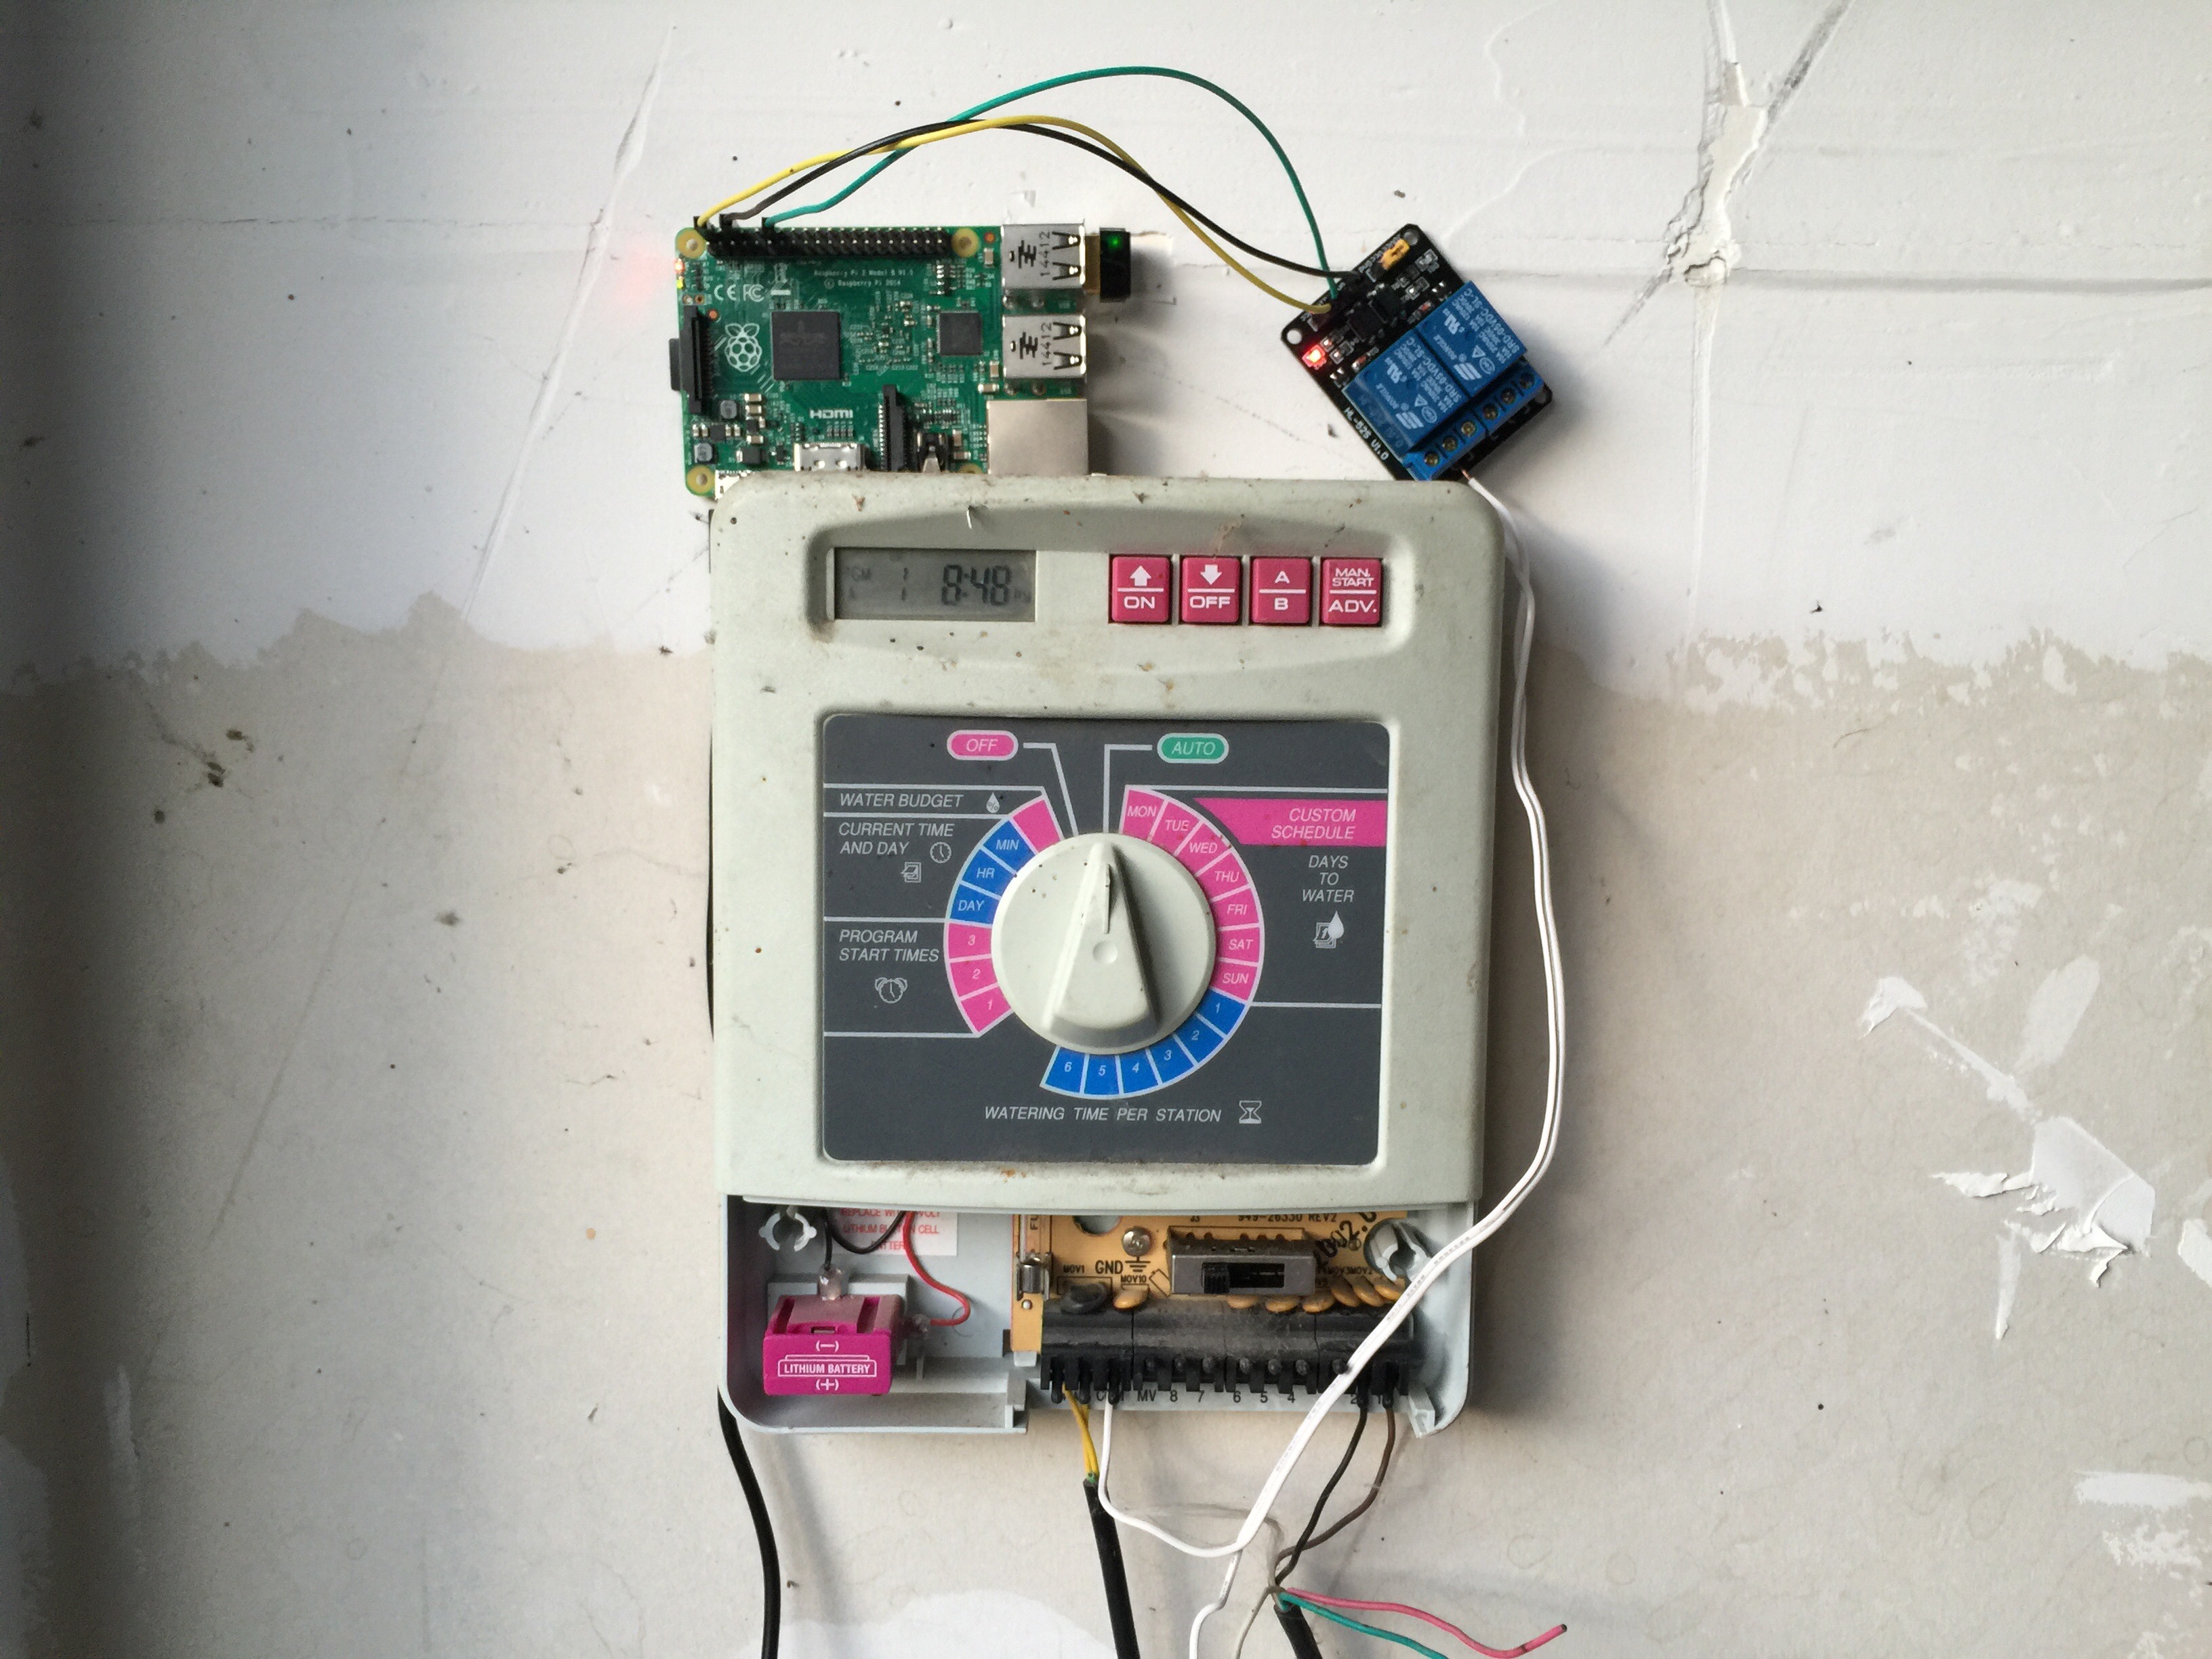
This was the setup, the only thing missing here is the source of water which goes into the gold fittings:


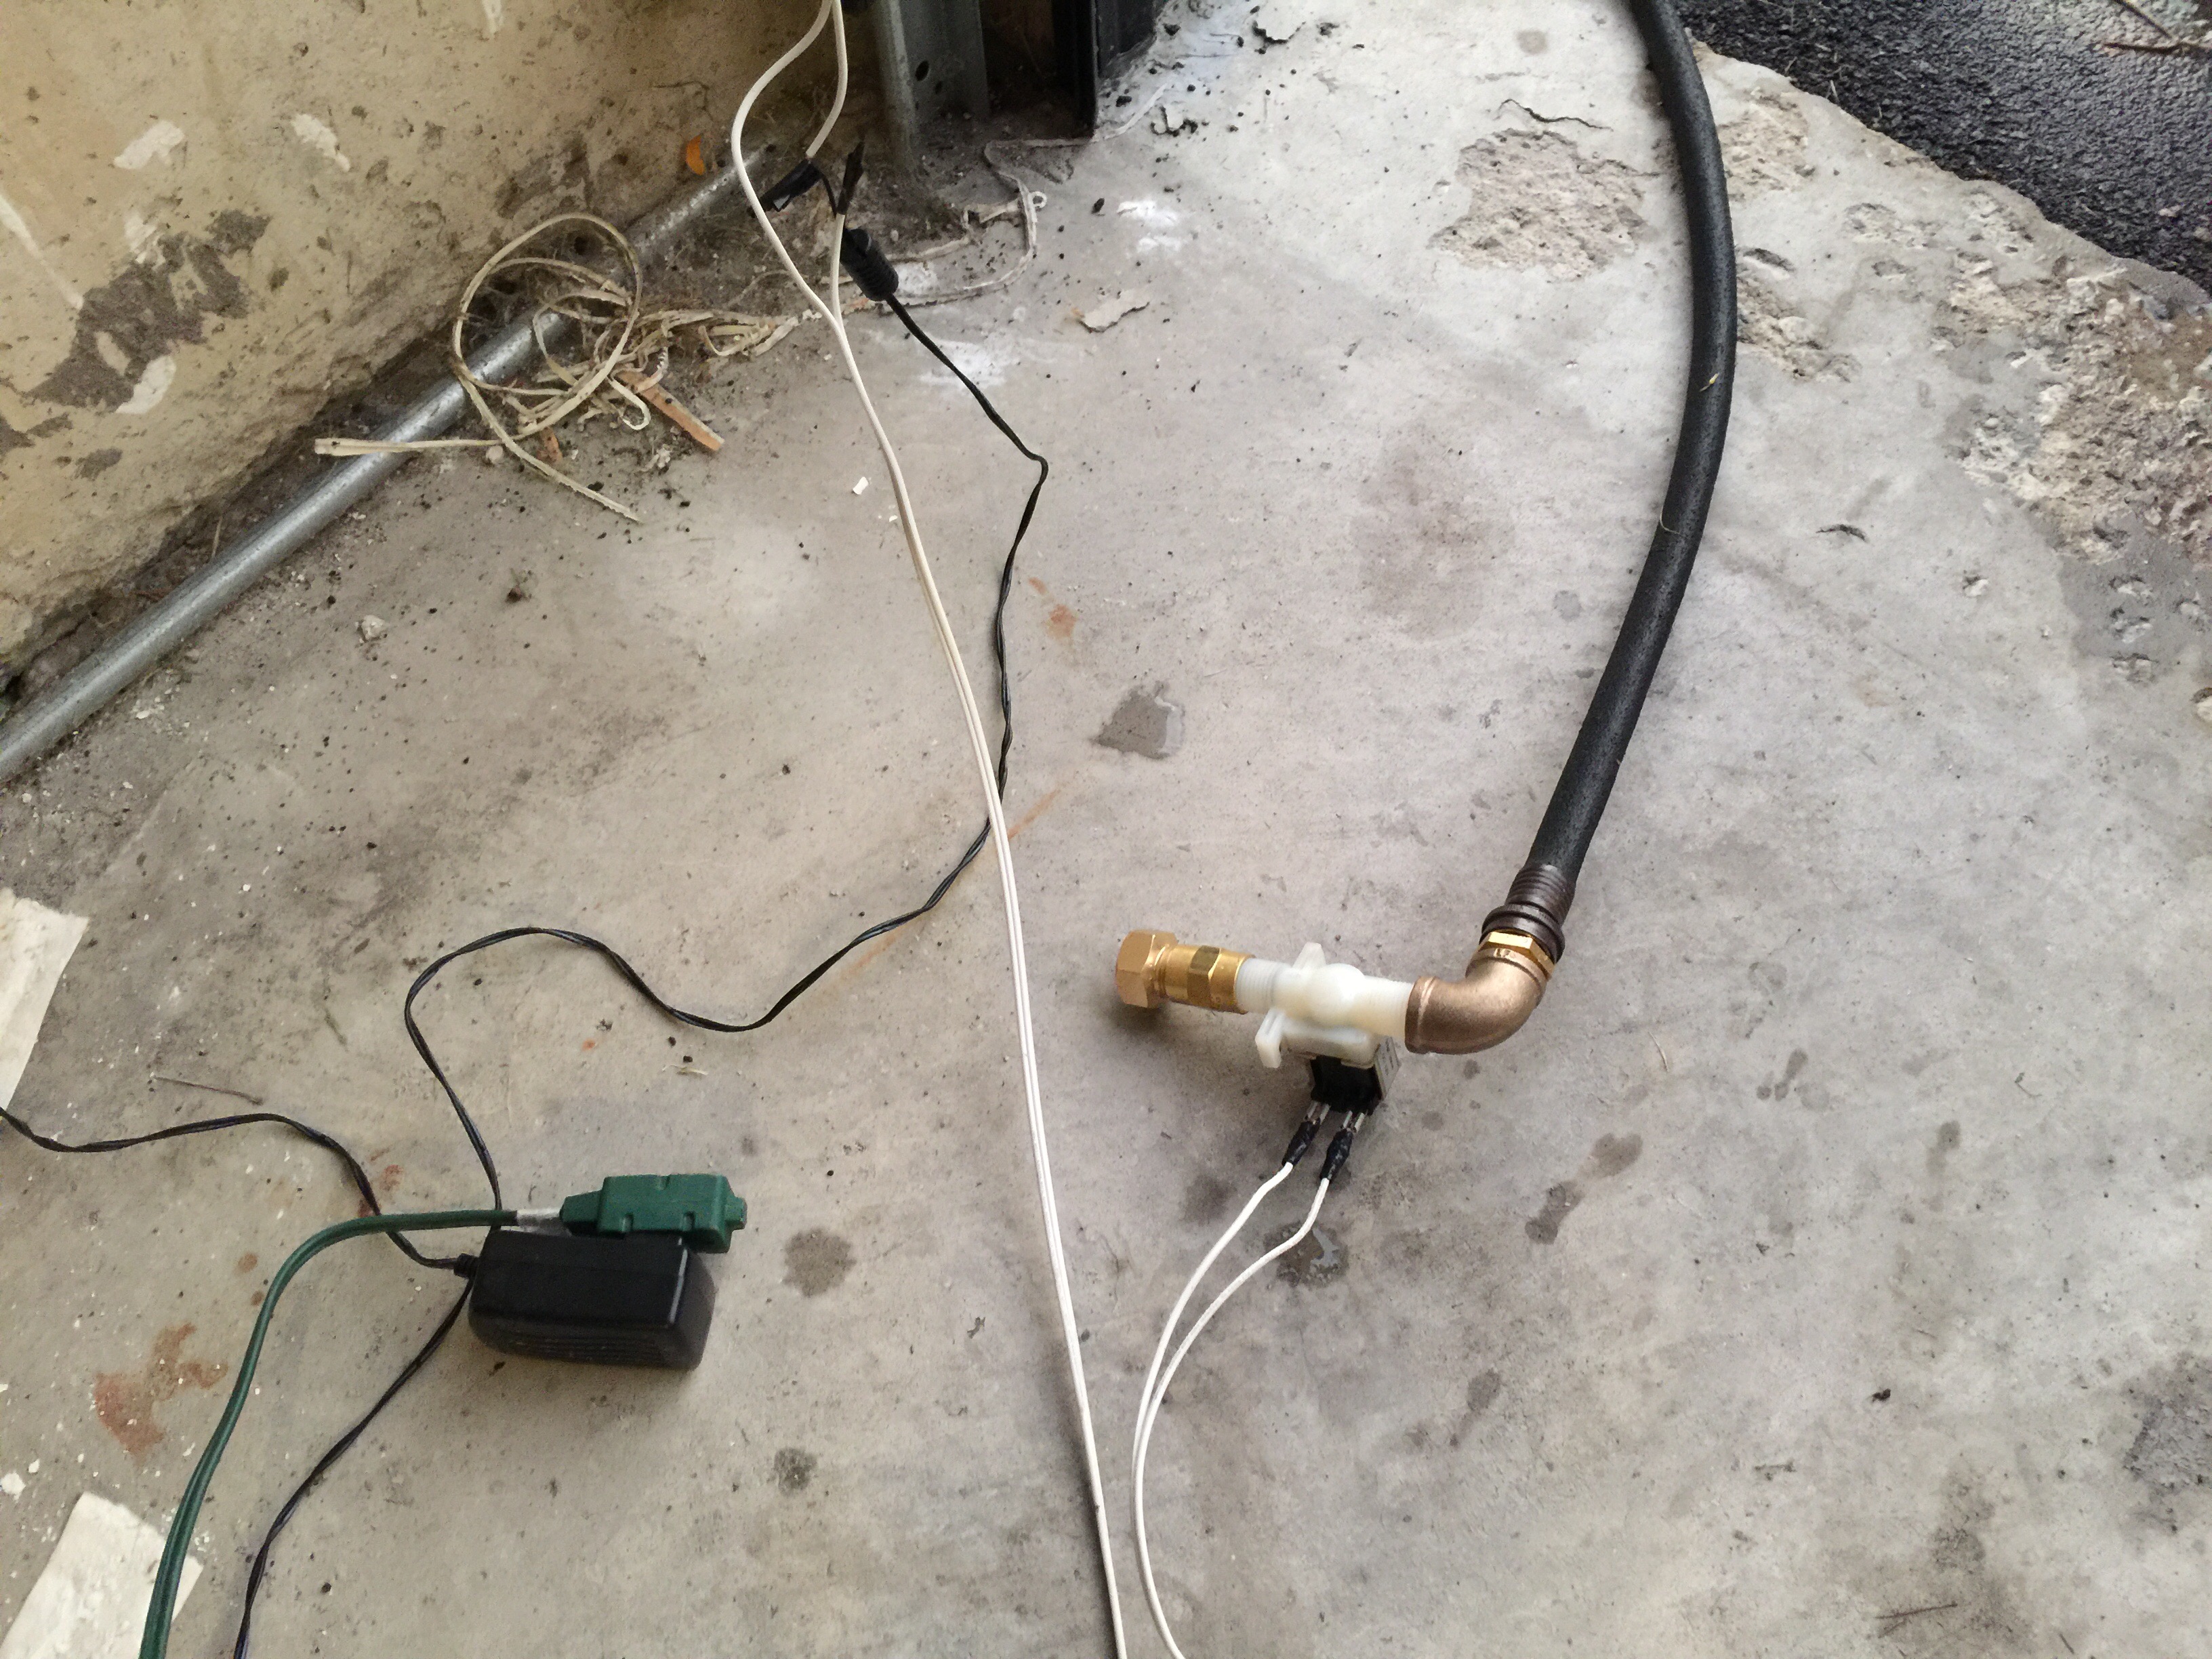
The two white wires leading away from the solenoid are in series with the 12V power supply and out of the picture they lead into a relay attached to a Raspberry Pi.  The Pi controls the relay, which in turn completes the circuit with the 12V supply and the solenoid, thus opening it, and allowing water to flow through the soaker hose.

This was a fun little project, the wiring being the messiest part, but it’s worked well for the past month without intervention from me.  Of course it’s end of summer and fall now so I don’t need this any longer but it’s all ready for next year!  The next thing will be to integrate it with the HomeKit project so that I can see it in the new Home app and know when it’s working (with pop-ups on the phone).

Advertisement

A sprinkle here and there…


It’s been a while since I’ve posted, but I wanted to share another recent project.  In the last week or so there have been a few times where the sprinkler system has gone off while it was raining or just before/after it had rained.

I know there are some sophisticated open source sprinkler system interfaces out there (ie Open Sprinkler Pi), but I wanted to use what I have already and keep it cheap and cheerful.  The current scheduler works fine but I want the option to interrupt it for the reasons mentioned above.  However, this older model sprinkler (Rainbird ESP-6TM) did not come with a “rain bypass” option.  Reading through the documentation however it seems possible to interrupt the program by breaking continuity in the COM line.  Typically this is where they would sell you the Rainbird optional rain sensor, and you would wire it here.  Instead though, we can insert our internet enabled Raspberry Pi to check some open weather APIs to check conditions in the area and interrupt accordingly!

You can find the code I used, leveraging the weather underground API and a little javascript, here.

Garage of Things… Part 1

I promised previously to go through how I setup control of the Garage door with the Raspberry Pi and to interface with Siri, well, first let’s go through how to wire it up to the Pi and control it with a simple Python script.

What you’ll need:

  • Raspberry Pi (I’m using version 1 model B+)
  • 2 Channel Relay
  • Some small gauge wire for connecting the Garage Door motor with the relay (I used leftover wire from the garage door install)
  • USB Wifi dongle for your Pi, I like the TP Link WN725N
  • Male to Male Jumper wire, like you can find in a set (see here or Amazon)

Continue reading

What’s hub with that?

WinkHub

Hubs.  Everyone’s got one, and you’ll need one (or twenty) of these things at some point in your home automation ventures.  Why? because apparently it’s expensive to build all the compatibility for the newer automation ecosystems like Nest (Google) and Homekit (Apple) into hardware like lightbulbs, and easier to build it into a separate hub, where all of these emerging standards can more easily (and cheaply) be packaged up.

Unfortunately for you, this means if you want to use Phillips Hue, you need their hub.  If you want to use Lutron switches, you need their hub.  Oh, you want to use GE Link bulbs? Guess what, no worries, they have a hub.

Continue reading

Raspberry Pi… Zero Calories

BlogHeaderRpiZero

Recently the Raspberry Pi foundation announced another exciting milestone for enthusiasts in IoT and home automation… a $5 version of the massively popular Pi.  Named the Raspberry Pi Zero, it takes the already quite small credit-card sized Pi and deploys it in an even smaller package at an incredible price.  Good luck finding one though… Although, I did manage to find one recently, but only if I purchased it in a more expensive bundle.  The bundle though included external pins, an adapter for the mini HDMI and another for the micro-USB, all of which I could use.  You can find it here if you are in the Toronto area.

Continue reading

And for dessert… Raspberry Pi!

RaspberryPi2_SmallerBW

There’s nothing quite as delectable for your next home automation project as Raspberry Pi.  If you’ve been living under a rock and are unfamiliar with this amazing little device, it is essentially a hobbyist’s dream.  It is a small, embeddable computer that costs around $30.  Projects with it range from making remote controlled Lego robots, to putting one in space.  For physical computing and automating your home, it is a great form-factor, and there are a plethora of projects to choose from.  You are really only limited by your creativity.  Some example projects I’ve been investigating:

  • Automating your home sprinkler system so that it adjusts the schedule depending on the weather
  • Wiring up your own Nest-like thermostat controller
  • Controlling your garage door with Siri

This last one was a good use case for me, as we had just re-done the garage doors and I didn’t want a control panel marring the new fascia we had installed surrounding the door frame.  I wanted to keep it clean but still wanted to be able to open the door if I wasn’t in the car.  What better way than with Siri!

Continue reading

“Computer, engage forward lighting array”…

LightOptions2_Small

I actually use Siri quite a bit, and while I’d love to pretend I’m Picard from TNG, Siri hasn’t quite caught up yet… or has he/she/it? I’ve been experimenting with automating the lighting around the house, and a key ingredient is going to be using Siri.  A couple of use cases I had which I wanted to tackle included:

  • Dimmable lights where you normally wouldn’t have them, for example with the pair of lamps in my bedroom.  I was also curious about the very cool mood lighting you could achieve with Philips Hue, giggity giggity goo 😉
  • I wanted to be able to use Siri to turn off the outside landscape (or Christmas) lighting.  It was all setup on a timer, but I wanted to be able to easily override this without venturing outside to the bitter cold.  Lazy? Maybe.
  • We have pot lights on the outside of the house, already controllable / dimmable inside the house.  Cool.  However, I was interested in having these turn on only when I arrived home, and turned on/off at a set time, which changed with the seasons automatically.  I knew I could do this with IFTTT or the right app, but needed those lights first to be appropriately “connected”.
  • Additionally, I had areas inside the house that I similarly wanted to automate either by some event (eg arriving home), at a specific time, or with a simple command (like “Good Night”).   These areas included the overhead cabinet lighting in the kitchen, pot lights around my reading nook/desk, the living room, etc.


Continue reading

The HomeKit API and My Garage

My first foray into home automation began when I came across a post about controlling your automatic garage door opener with Siri (for those of you unfamiliar with Apple, this is the name for the iOS voice interface).  The project relied on someone reverse engineering Apple’s HomeKit Application Protocol.  HomeKit is a standard that Apple had been working on that:

  • Provides a common, secure means for different devices to communicate
  • Allows an iOS Application to interface with many different devices, avoiding the complexity of trying to handle many different proprietary protocols or poorly implemented or followed standards (eg Zigbee, more on that later)
  • Enables iOS or any application that understands the HomeKit protocol and is properly authenticated to “see” your home configuration.  This means, you can configure your home rooms, groupings, etc in one app, and they will persist in another.
  • Leverage Siri for context driven voice control.  For example “Hey Siri, Open the Garage” vs “Hey Siri, Turn the Garage On”.  You can use more natural language, without needing to program for it;  There are a long list of characteristics and attributes available via the HomeKit definition that allow you (or a manufacturer) to specify what kind of device you are interfacing with.
  • If you have an AppleTV (gen 3 or 4 I believe) and it’s authenticated with iCloud, it will act as a secure proxy and allow you to communicate with your HomeKit enabled devices at home when you are out of the house or traveling.

So, beyond all the positives of the HomeKit API, is the fact that there is a wonderful open source Node JS project that exposes all of this functionality.  When paired with an easily programmable device like the Raspberry Pi, you now have a powerful way to turn almost anything into a voice controlled part of your home automation strategy.